Why do you need to resize images
Up to this point eHive has had a maximum image size of 800 x 800 pixels. This included an option to keep the original image, but the image that appeared on the eHive account remained at a maximum of 800 x 800 pixels.
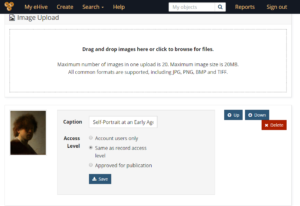
With the new improvements to eHive launched in March 2019 you can attached images up to 20 MB. These can now be viewed in eHive with the pan and zoom features. Of course this is optional and you can choose to only allow public access to images at a maximum of 800 x 800 pixels as we always the case.
In the past eHive would have automatically reduced the size of images over 800 x 800 pixels. Going forward you will need to make sure that the images you are uploading are the scale you wish to display. In some cases this will require you to resize your images prior to uploading them.
Software
The following are applications that you can use to resize images.
Adobe Photoshop (Paid)
Affinity Photo (Paid, Mac only)
Preview (on Mac)
Fotosizer (Free, Windows only)
Gimp (Freeware)
Online platforms
The following are online software (SaaS) that you can use the resize images
Managing Image Collections
When you resize your images it is best practice to save the original image so that you can always return to the original at a later date. Following that you can save your new resized image. Take a minute to think about what you will name the image. Popular naming conventions often include accession numbers, object ID’s or dates to help keep images organised.
Here is a good summary of Managing Image Collections from the University of Michigan

